Sunday, April 17, 2011


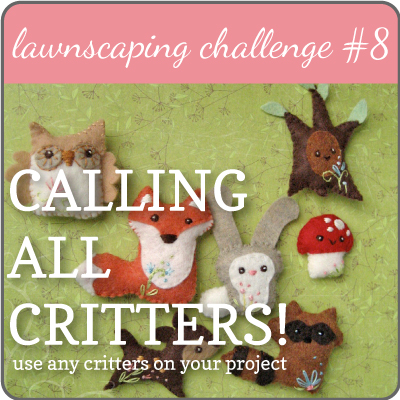
Lawn Fawn critter challenge
Thought I would enter this into the Lawn Fawn Critter challenge!

Happy crafting!
Cheers
Susie
Punching and cutting
The following two cards are also for Mothers Day but could also just be general cards. I have utilised punches on the first card and cutting of images on the second card. I punched the leaves and edged them with chocolate chip ink. The flowers were punched twice with the top one shaped around a stylus to give dimension. The image was stamped then punched out with the large scallop oval then adhered to card front. The scallop edge gave the shape to follow for the wreath. The ribbon bow was tied separately and, tucked under the flower and adhered with a glue dot.

Card -
Paper - whisper white from SU, Cottage wall DSP from SU, pink Core'dinations basics c/s
Stamp - Hero Arts Leaf pattern
Ink - old olive from SU, chocolate chip from SU
Tools - two step bird punch (for the leaves), large scallop circle, itty bitty flower punch, sponge dauber
Other - old olive ribbon from SU, Kaisercraft soft pink pearls, Kaisercraft floss paper rose
Adhesive - snail, sticky strip, glue dots
This card uses a large "quilt" style stamp. I stamped it in chocolate chip three times and then cut out some squares to layer and fussy cut the butterfly to pop up. I then coloured the images using chalks. I matted the image onto chocolate chip c/s and then onto a "text" DSP with dimensionals. The flower is adhered first onto the ribbon with a large zot. The bow is tied separately and tucked in behind the flower with glue dots.

Card -
Paper - cream marle effect c/s from stash, unknown "text" DSP, chocolate chip c/s from SU
Stamp -Victorias secret "ornate squares"
Ink - chocolate chip from SU, various chalks
Other - chocolate chip ribbon from SU, Kaisercraft latte paper rose, Kaisercraft latte pearls, Maria George trinket pins
Adhesive - snail, dimensionals, sticky strip, large zot, glue dots
Happy crafting!
Cheers
Susie
Mothers Day
I am making a whole heap of Mothers Day cards for a stall at my daughter's school. I thought that I would show a selection over the next week or so. I am using lots of different styles and trying out some new techniques as well as colour schemes outside my comfort zone of pink or purple! The centre panels on this card are popped up with dimensionals and the bow was tied separately first with the brown and then the gold organza over the top of that. It was then secured with a large zot.

Supplies:
Card -
Paper - cream c/s from stash, old olive from SU
Stamp - leaf pattern - Hero Arts, Artee stamps crackle on the background green piece.
Ink - old olive from SU
Other - American Crafts ribbons, Maria George trinket pins, Kaisercraft latte pearls, Kaisercraft latte paper rose
Adhesive - snail, dimensionals, sticky strip, large zots
This next card uses much the same colour scheme but is hand coloured. The flower is done with Tombow markers and I coloured the c/s with ochre chalk and sponged the edges with chocolate chip ink. I sponged the edges of the DSP with ink as well. The flower panel is popped up on dimensionals.

Supplies:
Card -
Paper - donkey c/s from stash, whisper white from SU, unknown text DSP from stash
Stamp - All night Media - "Anna Griffin"
Ink - chocolate chip from SU, ochre chalk, various Tombow markers
Tools - sponge dauber
Other - American Crafts ribbon from stash
Adhesive - snail, dimensionals, sticky strip, glue dots
Happy crafting!
Cheers
Susie
Friday, April 15, 2011
Congratulations!
Last year my friend Karen and I did a stall at our daughter's school. We thought we had a wonderful selection of cards with every possible occasion covered. Not so! One lady was most disappointed that we did not have any general congratulations cards. We had wedding, engagement etc. So without further ado I give you - a congratulations card! The DSP and chipboard elements were a magazine freebie. I highlighted the little lanterns on the paper with crystal effects.I also paper pierced around the circle and lantern elements.

Card -
Paper - magazine freebie DSP, purple textured c/s from stash
Stamp - Judykins cube stamp BS7911
Ink - elegant eggplant from SU
Tools - CM circle cutter template large, paper piercer
Other - chipboard elements from magazine, Patterned flower from Prima "paisley road", blue flower with diamante centre from stash, crystal effects
Adhesive - snail, dimensionals, glue dots
Happy crafting!
Cheers
Susie
Easter wishes
I made these little boxes to give chocolate to my good friends this easter. They are based on a box I was given for my birthday last year. Basically you need a square of paper or card stock that is divisible by three. I used 24 cms. Then you score at 8cm and 16 cms - turn the piece 180 degrees and score at those two measurements again. You end up with 9 squares. Then with the middle square at each side you measure 4cms from the centre square edge and then mark. Draw a diagonal line from the edge of the centre square to your mark. You are creating a triangle shape on the outer edge square. This forms your cutting line. When you have finished cutting all the sides you will end up with a four pointed star. Fold inwards on your score lines and voila you have the box. Punch a hole in the top of each point for the ribbon tie. I used three layers - one card stock and two DSP, but if you don't require it to be very strong you could get away with just using double-sided DSP.

Paper - unknown DSP, core'dinations basic c/s
Other - ribbon - pretty in pink by SU, puffy flower from Bed Bath and Table, pearl trim from Spotlight
Adhesive - double sided tape, sticky strip, large zots, glue dots
This one I highlighted the pattern of the DSP with kindyglitz.

Supplies:
Paper - DSP from SU, core'dinations basic c/s
Other - kindyglitz, puffy flower from Bed Bath and Table, ribbon - old olive from SU
Adhesive - double sided tape, large zots
Happy crafting!
Cheers
Susie
Subscribe to:
Posts (Atom)